“Building a Task Suggestion App with PySide” App Development Diary Part 1
Introduction
The application development diary starting with this article is a development diary that records my experience and knowledge in developing Python applications using PySide6 (Qt6). I will record the series of steps from the construction of the development environment to the completion of the application, as well as the troubles, solutions, and techniques I experienced during the process.
The impetus was “I want a task suggestion app.”
There are many task management software and services that manage task management software and to-do lists. But what I wanted was
An application that suggests what I should do now.
Frankly speaking, even if the task management screen is full of tasks and you can set some priorities, it is hard to pick something out of the list. To begin with, the process of setting priorities is hard.
So, I would like to have an entity that decides when I sit down at my desk, “Do this now.” Forget about task management, I wanted an app that would tell me what I need to do now, in the order I need to do it, and that’s it.
This is an article I found in the middle of all that. It is a life hack to score and manage task priorities based on several criteria. I like it. Let’s make an app for something like this.
Perhaps existing services or software can do something similar, but I thought it might be useful to create a robot-related application in the future, so I decided to try to create one from scratch.
I will also try uploading and publishing to GitHub, which I have not done so far, and record the whole process.
In this application development diary, I will keep such records.
Selection of programming language and GUI library
The algorithm for prioritizing tasks is probably not a very complex process. Therefore, the most important thing is the GUI library. For the language, we plan to use Python, considering its ease of creation and the richness of its library.
On the other hand, there are several well-known Python GUI libraries. However, I wanted to create a cool-looking application as much as possible, so I selected Kivy and PySide as candidates.
Kivy is very cool, but it seems that it sometimes struggles with Japanese input, so I decided to pass on it this time. (In fact, I had made the application to the point where I could try it out, but it was too complicated at the Japanese input point, so I gave up on it. Some people have suggested a way to deal with it, but I passed on it this time.)
So I will use PySide, a Python binding of the famous framework Qt. Simply put, it is for using Qt in Python.
PySide was originally designed for Qt4, but there is a version for Qt5 called PySide2. This time I will use PySide6 for Qt6. (I was a little confused because the numbers correspond to PySide→Qt4, PySide2→Qt5, and PySide6→Qt6.)
An application framework developed in C++. One of its features is that it is cross-platform (can be used commonly between different environments). There are commercial and open source licenses. Official page
What kind of application to make
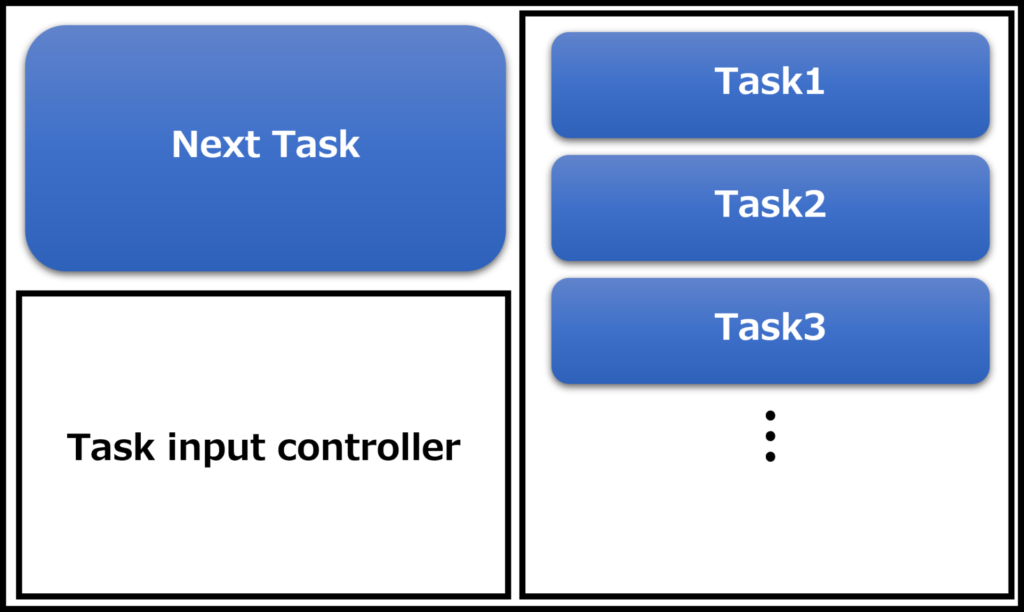
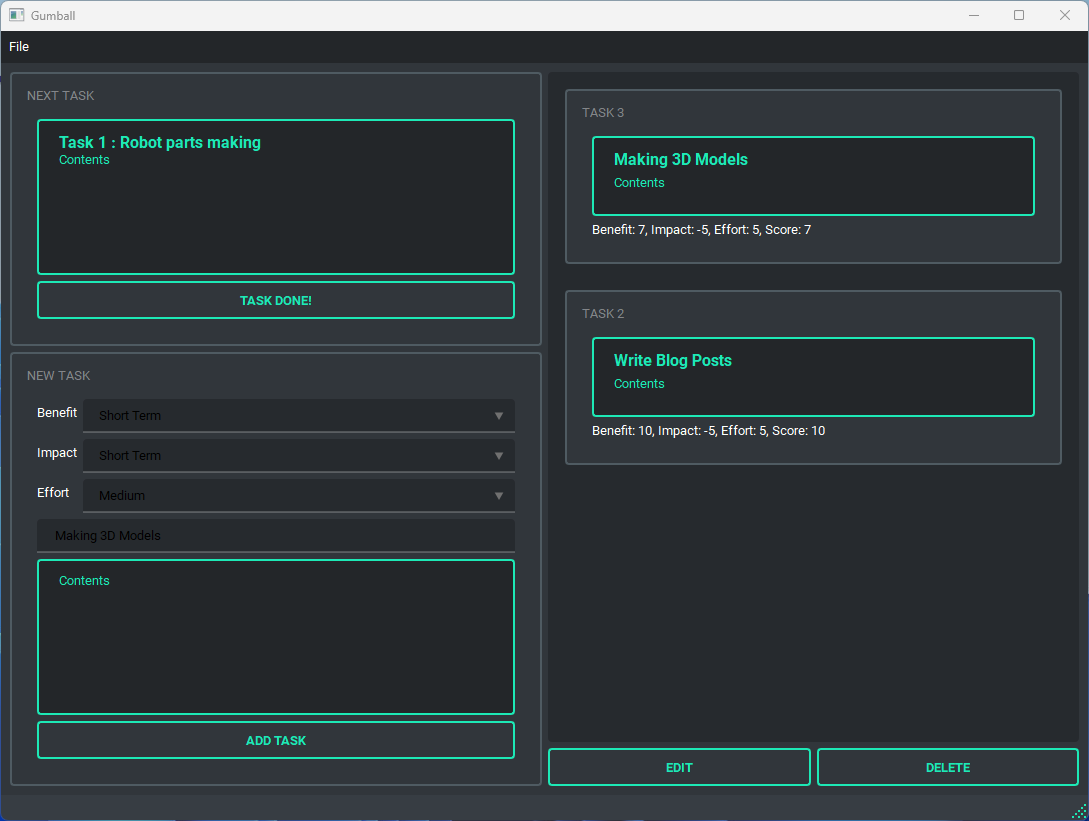
Figure 1 is an image of the application. The right half of the window shows a list of tasks that should be accomplished. These tasks are arranged according to their automatically calculated priority. The task that needs to be done immediately is displayed in the “Next Task” section. When this task is completed, the next task is set to “Next Task.” The “Task input controller” section provides a place to enter the settings and contents for deciding the priority level where you can enter the task.
These contents are also saved in an external file and can be read at any time.
Setting up the environment
First, create a virtual environment. I always use Anaconda to create virtual environments so I will do the same. Incidentally, I summarized the creation of a virtual environment in a previous article.
This time, I will use Python version 3.10.
Also I install the PySide6 library. I usually install with conda, but it didn’t work, so I installed with pip.
pip install pyside6The cool app design that we see so often these days seems to be called “Material Design.” Google proposed this in 2014 and they established guidelines.
As for the design, I definitely want to adopt this material design and make it stylish. So, I will introduce Qt-Material. This is a theme that changes the appearance to look like Material Design just by installing it. I install it with pip. (If you use another framework called Qt Quick, you can set up a Material Design theme without installing Qt-Material, but I will not use it this time).
pip install qt-materialI also want to create the GUI intuitively, so I will install Qt Creator. But I will mainly use Visual Studio Code for coding. I think Qt Creator can be installed from the official installer of the open-source license, but I installed it from Chocolatey because I am in a Windows environment.
Package management system for Windows. The popular package management software is apt for Debian systems and Homebrew for Mac OS. Official Site
Next
Now I will actually create the application in the next article! First, I will design the GUI using Qt Creator.