Solving errors when developing software for Raspberry Pi Pico using PlatformIO in a Windows environment!

Raspberry Pi Pico does not work on Windows 11
When I tried to develop software for the Raspberry Pi Pico using PlatformIO, I ran into a problem from the very beginning. It seems to be a Windows-specific problem. I will record the solution (as of 2022/10/16).
The environment is like this.
- Windows 11
- Visual Studio Code (ver. 1.67.2)
- PlatformIO installed
- Created an Arduino project for Raspberry Pi Pico with PlatformIO
PlatformIO and Raspberry Pi Pico
The Raspberry Pi Pico can be programmed in a variety of environments. The most commonly used is Thonny with MicroPython; other options include CircuitPython and the Arduino IDE. Another option is PlatformIO.
The PlatformIO documentation says
What is PlatformIO?
PlatformIO is a cross-platform, cross-architecture, multiple framework, professional tool for embedded systems engineers and for software developers who write applications for embedded products.
https://docs.platformio.org/en/latest/what-is-platformio.html
PlatformIO allows you to create programs for various embedded boards with the Visual Studio Code editor.
With PlatformIO, you can also develop in C/C++ using the official SDK, but this time I set it up as an Arduino project.
Can’t send program to RaspberryPi Pico…
I actually created an Arduino project in PlatformIO and sent a simple LED blinking program to the Raspberry Pi Pico. Then…

The upload failed as shown in Figure 1. A closer look at the console shows “Auto-detected: COM1″.
What is happening?
Now let’s actually check it in Device Manager. COM1 is being used by another device. On the other hand, the Raspberry Pi Pico is not recognized as COM1.
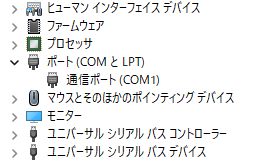
It appears that the USB driver for the Raspberry Pi Pico is not installed and is not recognized properly.
Solved by installing USB driver
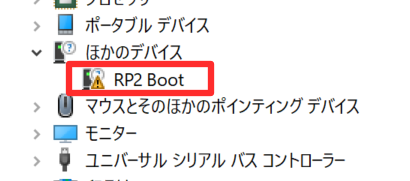
Then, looking more closely at the device manager, I see “RP2 Boot” in the “Other devices” section. This is the Raspberry Pi Pico that I have connected. I need to install the correct USB driver for it.
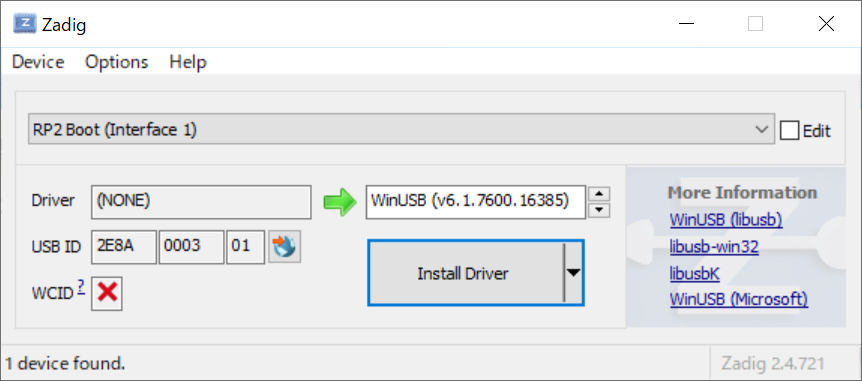
There are several tools available to install WinUSB easily, but I decided to use Zadig, this time via Chocolatey. Start Zadig, select RP2 Boot and install WinUSB.
The corresponding COM port is then recognized and the program can be sent from PlatformIO. Figure 5 shows the PlatformIO console screen at that time, which changes to “Auto-detected: COM3″ and then the upload is executed.
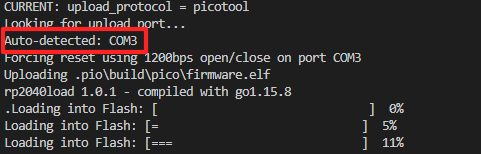
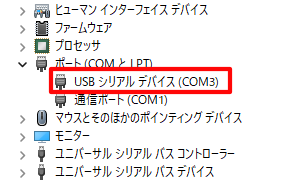
If you look at the device manager again, you will see that the Raspberry Pi Pico is now recognized as COM3, as shown in Figure 6. COM3 is only for this environment, so it may be assigned to another port other than COM3 depending on the environment.

And the LED flashing program worked! (Figure 7)
Appendix: What to do when it is not recognized as a COM port
In some cases, even if another Raspberry Pi Pico is connected after driver installation, it only appears at the Universal Serial Bus Device and is not recognized as a COM port (Figure 8).
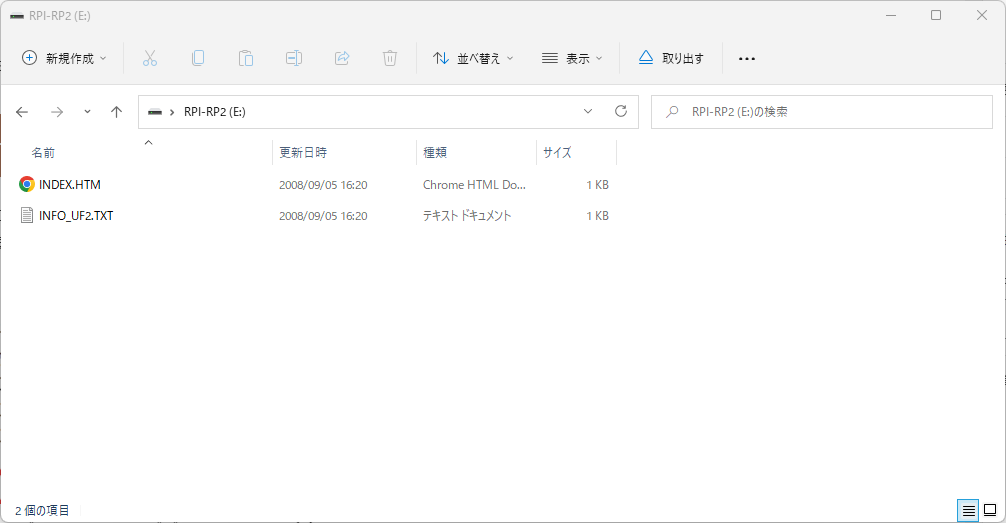
In this case, once you write a program for serial communication directly to the Raspberry Pi Pico’s storage, it will be recognized as a COM port. If it is not recognized as a removable drive, insert the USB cable while pressing the BOOTSEL button on the Raspberry Pi Pico.
Next, download ‘Hello World’ UF2, a sample distributed on the C/C++ SDK page of the official Raspberry Pi website.
Then drag and drop the downloaded UF2 file onto the Raspberry Pi Pico, which is recognized as a removable drive (Figure 9). It will then reboot and be recognized as a COM port.