From creating your own Arduino library to using it! Easy Tutorial
If you are familiar with Arduino, go to “Create a library.”
If you want to use multiple external files, go to “Using multiple external files.”
Arduino and Libraries
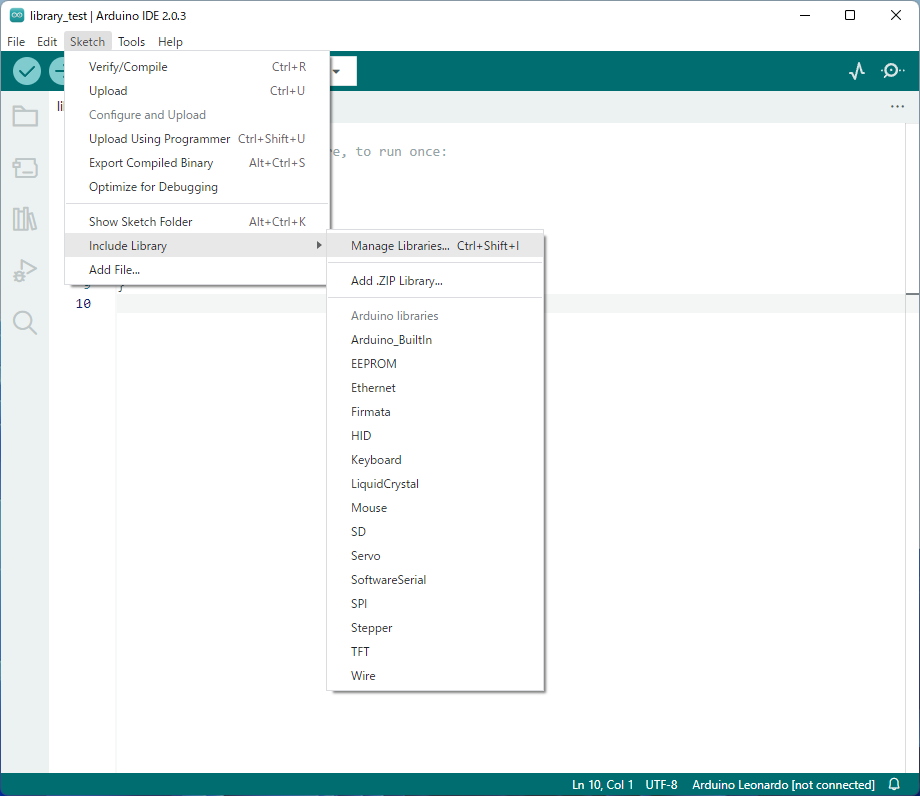
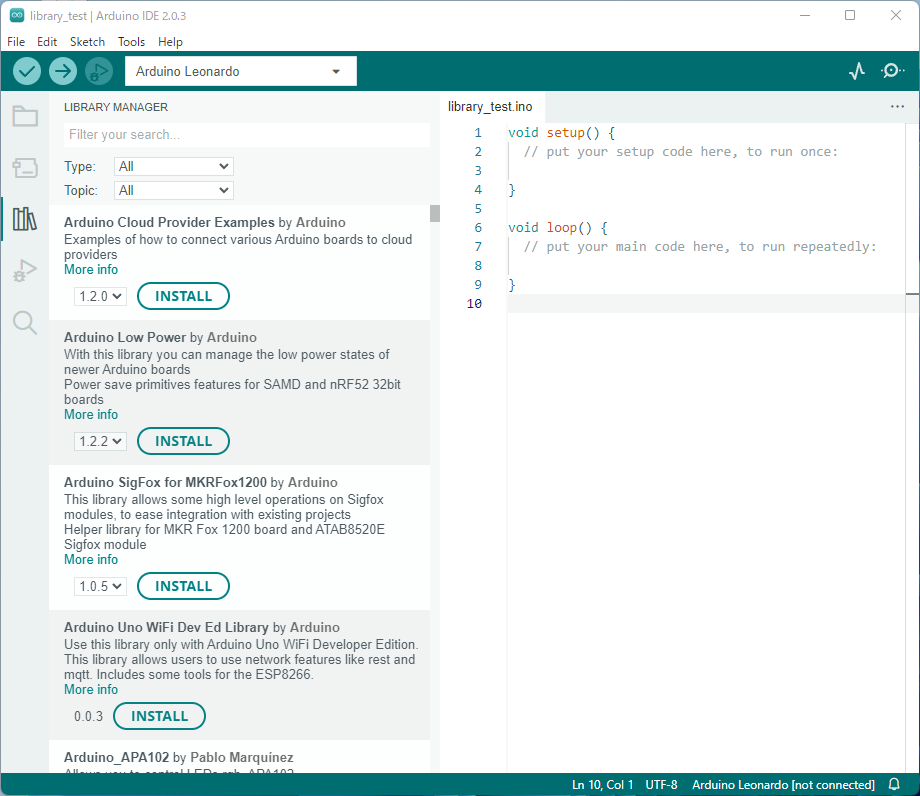
When you create an Arduino sketch (program), you may want to add various functions. The chunk of code that provides these functions are called “libraries.” Various types of libraries are provided and can be added as needed (Figures 1 and 2).
These libraries are written in C/C++ and are slightly different from Arduino sketches (extension .ino). You can use these libraries by including them in your programs.
On the other hand, if you can write such a program yourself, you can register it as a library and call it at any time. Once you have written such a program, you can use it as an Arduino program without being aware that it is written in C/C++.
Now let us look at how to create a library.
Create a library
When creating your library, you need to prepare a C/C++ program consisting of a header file (extension .h) and the corresponding source file (extension .cpp). (In some rare cases, only the header file is needed.)
First, create a header file. The header file contains information about the corresponding source file. This header file tells the compiler (the part that turns the program text file into actual software) how to use the program in the source file so that it can be used. More precisely, the header file contains declarations of variables, functions, classes, and so on.
Let’s create a test library with some simple functions as a trial. First, create a sketch and name it library_test.ino.
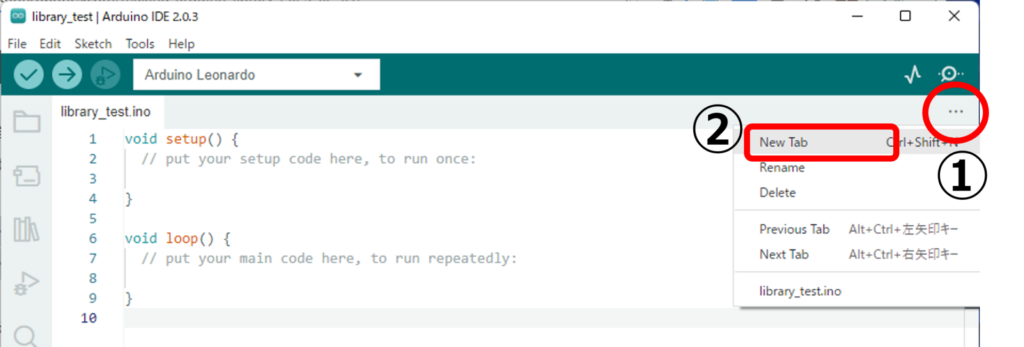
Now click on the “…” button in the upper right corner of the ArduinoIDE and select “New Tab” to prepare the header and source files (Figure 3).
When the window shown in Figure 4 appears, enter a name and press OK. This time, name it TestLib1.h. Similarly, create the corresponding source file, TestLib1.cpp.

At this point, you have to be careful with what is called the “include guard.” A header file is usually included in several files. However, it is problematic if a header file is loaded multiple times in a program, and the declarations are used multiple times, resulting in multiple declarations of the same variable, function, or class. For this reason, there is a mechanism to ensure that a file is included only once in its entirety, called an include guard.
Now, describe the include guard part in the header file. In TestLib1.h, write the following
#ifndef TestLib1_h
#define TestLib1_h

#endif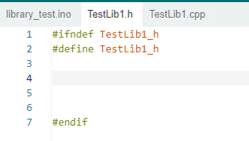
You can replace TestLib1_h with (filename)_h when creating other files. Also, be careful not to forget the #endif at the end. The meaning of this process is “if TestLib1_h was defined at least once by the preprocessor, the contents of this header file are ignored; if not, define TestLib1_h and the contents of the header file are expanded.” However, it is not a problem to just remember that this is the way it is, without being particularly aware of it.
Next, implement the contents of the header file. Only simple classes and methods are defined. In this case, I define the class TestLib1 and the method testMethod1().
#ifndef TestLib1_h
#define TestLib1_h

class TestLib1{

public:
  TestLib1();
  ~TestLib1();

  int testMethod1();

};

#endif
Then create a source file. In the source file, include TestLib1.h. Also, make testMethod1() a method that returns a constant 3. (This is C++ programming notation so I won’t go into detail.)
#include "TestLib1.h"

TestLib1::TestLib1(){

}

TestLib1::~TestLib1(){

}

int TestLib1::testMethod1(){
  return 3;
}
Now you are ready to use them from the Arduino sketch and you can write the following in the Arduino sketch library_test.ino.
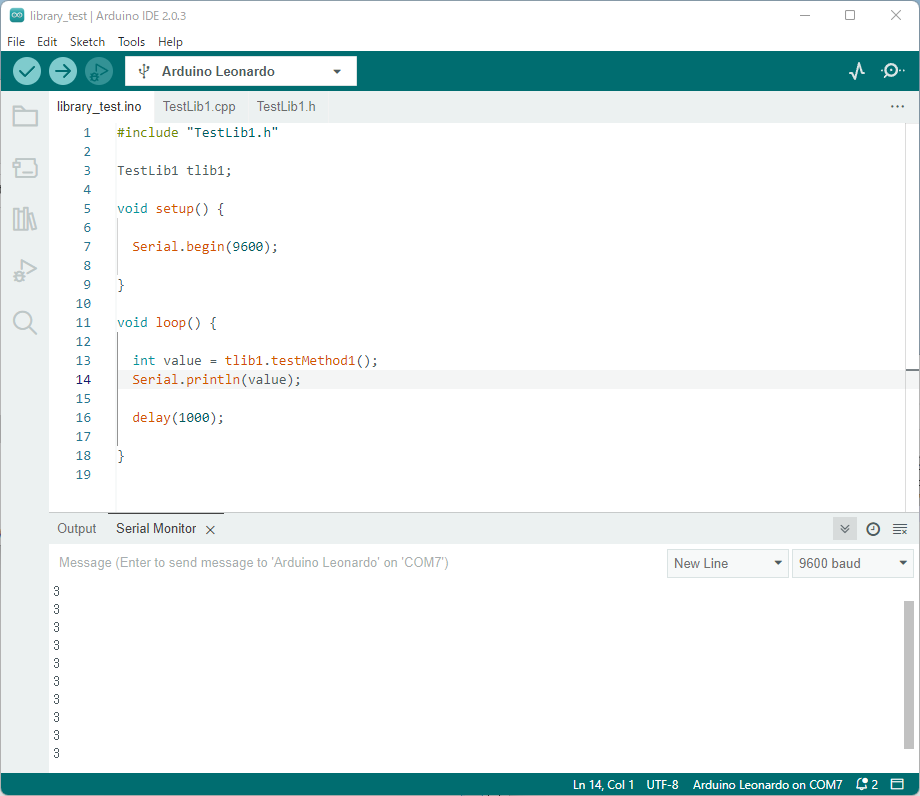
#include "TestLib1.h"

TestLib1 tlib1;

void setup() {

  Serial.begin(9600);

}

void loop() {

  int value = tlib1.testMethod1();
  Serial.println(value);

  delay(1000);

}
This program includes the created TestLib1.h and creates an instance of the created class TestLib1. It then starts serial communication to see the results. The serial communication calls testMethod1() of the TestLib1 class and continues to output its value every second (1000ms).
Now let’s write this program to the Arduino and look at it on the serial monitor (Figures 6 and 7). The serial monitor displays “3″.
You have successfully created your library!
In summary, if you are creating your own Arduino library, you should do the following.
- Prepare header and source files in C/C++ format
- Implement the contents of the file
- Include from main sketch
It is also possible to create and use another file. For example, it is possible to create another header file and another source file (TestLib2.h, TestLib2.cpp) and use them in TestLib1.cpp. For example, in TestLib2.h, TestLib2.cpp, define a class named TestLib2 and prepare a method named testMethod2(). testMethod2() is simply a method that returns “5″.
Implement each file as follows
#ifndef TestLib2_h
#define TestLib2_h

class TestLib2{

public:
  TestLib2();
  ~TestLib2();

  int testMethod2();

};

#endif
#include "TestLib2.h"
TestLib2::TestLib2(){
}
TestLib2::~TestLib2(){
}
int TestLib2::testMethod2(){
return 5;
}In class TestLib1, include TestLib2 and prepare a new method testMethod3() and an instance of TestLib2 as a field. testMethod3() returns an integer that is the sum of testMethod1() and testMethod2(). It should always return 3+5=8.
#ifndef TestLib1_h
#define TestLib1_h

#include "TestLib2.h"

class TestLib1{

public:
  TestLib1();
  ~TestLib1();

  int testMethod1();
  int testMethod3();

  TestLib2 tlib2;

};

#endif
#include "TestLib1.h"
TestLib1::TestLib1(){
}
TestLib1::~TestLib1(){
}
int TestLib1::testMethod1(){
return 3;
}
int TestLib1::testMethod3(){
return testMethod1() + tlib2.testMethod2();
}For the sketch, I will use testMethod3() where testMethod1() was used before, and output the same.
#include "TestLib1.h"
TestLib1 tlib1;
void setup() {
Serial.begin(9600);
}
void loop() {
int value = tlib1.testMethod3();
Serial.println(value);
delay(1000);
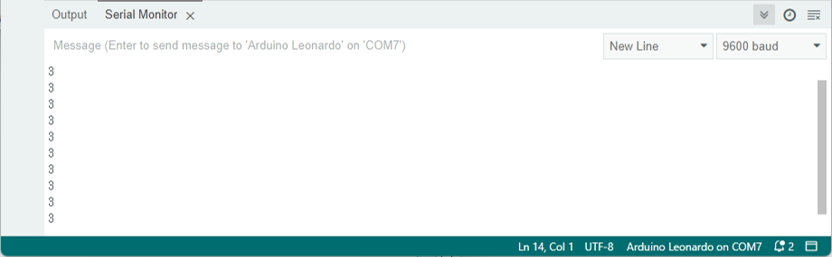
}The result is shown in Figure 8. The return value of testMethod3(), 8, appears every second.

Thus, multiple library files can be linked.
Using multiple external files
So far, programs to be made into libraries have been created in the Arduino IDE, but it is also possible to import multiple files together from outside and use them as a library. In this case, you can put all the files directly into the same directory as the sketch file, or you can zip the files together.
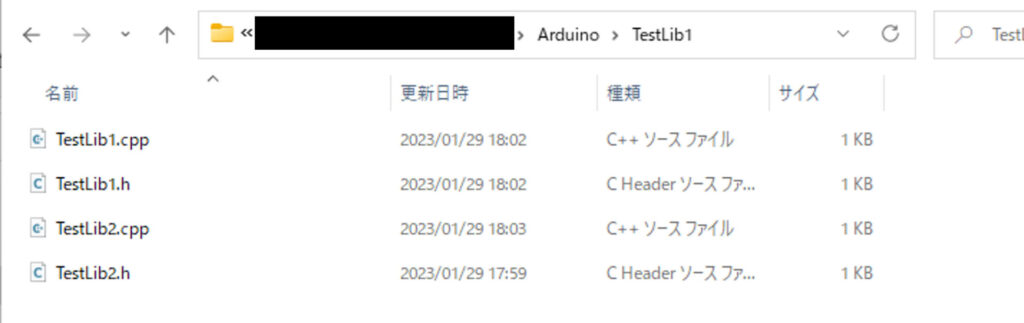
First, place all the files created so far, TestLib1.h, TestLib1.cpp, TestLib2.h, and TestLib2.cpp, directly into a directory named TestLib1 (Figure 9). Compress the TestLib1 directory into a zip file. In this case, I will use TestLib1.zip.
(Windows in the image is the Japanese edition)
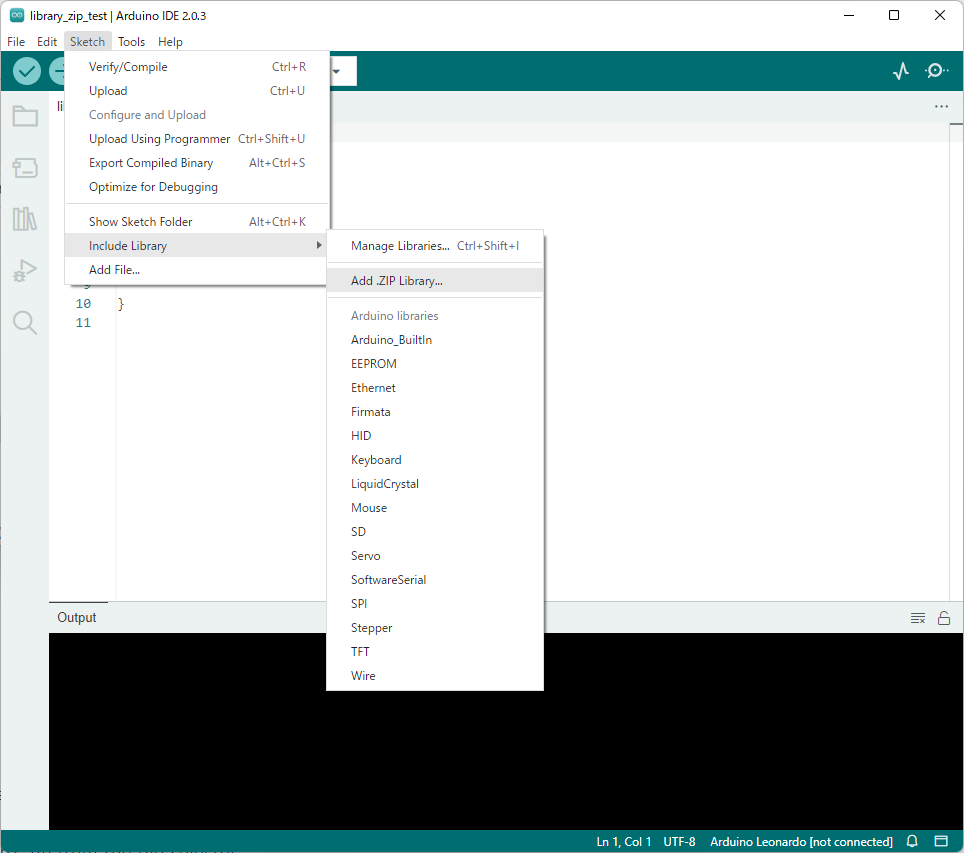
Also, this time create a sketch named library_zip_test.ino. Select “Sketch→Include Library→Add .ZIP Library…” from the menu (Figure 10). Then select TestLib1.zip from the file selector.
This completes the library installation. Now let’s try to use TestLib1 from library_zip_test.ino. library_zip_test.ino should be written as follows. The file library_zip_test.ino is almost the same as the previous file library_test.ino.
#include "TestLib1.h"

TestLib1 tlib1;

void setup() {

  Serial.begin(9600);

}

void loop() {

  Serial.println(tlib1.testMethod3());
  delay(1000);

}
The serial monitor should now output 8, the return value of testMethod3(), every second.
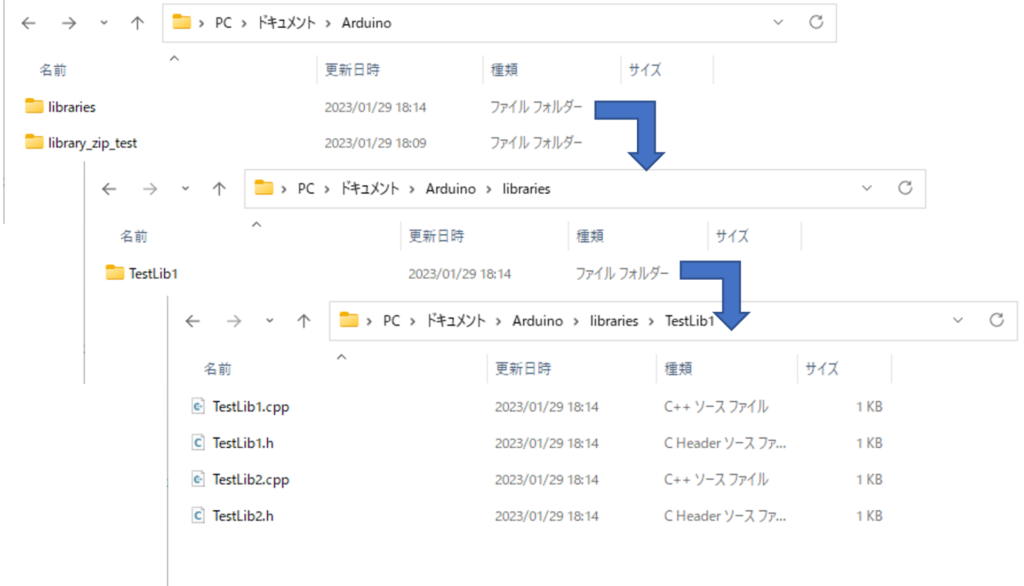
Now that the library is installed, a directory named “libraries” should be created in the same directory where the Arduino sketches are stored. The library files you created are located there (Figure 11).
(Windows in the image is the Japanese edition)
TestLib1 can also be selected from “Sketch→Include Library” (Figure 12).

In summary,
- Prepare external files for use
- Create a directory and put all external files in it
- Compress the created directory into a zip file
- Select the zip file from the Arduino IDE and install
For further development
This procedure allows you to use external libraries with Arduino, but you will need to prepare files like keywords.txt and library.properties if you want to distribute or configure them in more detail.
If you want to expand your knowledge and create your own library, the following will help.
https://docs.arduino.cc/learn/contributions/arduino-creating-library-guide
The library is written in C/C++, so knowledge of C/C++ is essential for further development.